Transfers
You can transfer stitches from either bed to the other. Transfering is used a lot to create texture stitches, shaping and bind-offs. In order to transfer a stitch, it's important that the needles are sitting directly across one another. Read more about needle bed positions here.
For this explanation, we want to transfer a stitch from the front bed to the back.
F = Needle on the front bed
B = Needle on the back bed
- The stitch is held by F.
- F moves up, the stitch it holds slides over the latch.
- B moves up, its hook is inserted in the transfer spring of F.
- F slides back down, the stitch is caught by B's hook.
- As F slides down, B's hook is released from the transfer spring through the opening in the front.
- The stitch is now held by B
Watch a video of a transfer here.
Transfer stitches are represented by these symbols in the stitch palette of the Kniterate design app:
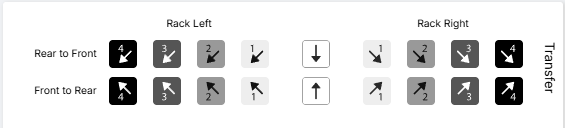
Loops can be transferred only from a needle in the front bed to a needle in the rear bed or vice-versa. To transfer a loop from one needle to another needle in the same bed, two transfer operations are to be carried over: the loop of a needle is first transferred to an empty needle in the opposite bed, then the rear needle bed is racked sideways, and the loop is transferred back to a needle from the original needle bed.
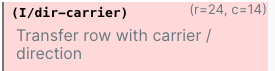
Transfer rows must have NO yarn carrier assigned and cannot be mixed with stitch symbols in the same row.
CORRECT

INCORRECT

This creates the following error:
The recommended settings for transfers, independent of the yarn count, are:
STITCH 0
ROLLER 0
SPEED 100
Find out more about transfers in this blog article.